Grow Your Pinterest: The 10 Best Practices for Growth in 2019
Here at Growth Machine, we’re always expanding our SEO horizons. Our next frontier? Pinterest.
In case you’re not familiar with it, Pinterest is a social media channel that allows users to save images from anywhere on the web to themed collections, called pin boards. It’s basically an elaborate visual bookmarking tool – but it’s so much more than that.
Although the interface looks different than Google SERPs it is a massive visual search engine.
For users, it is a place to find fashion, food, decorating, entertaining, and parenting inspiration.
And for brands in those categories, it has become one of the most engaged social media platforms to interact, advertise, and generate (usually) high-purchase-intent traffic.
While Pinterest might look simple from the outside, using Pinterest effectively requires more than just showing up and pinning a few pretty photos. The volume of content in the network, as well as the algorithms that decide what users see, requires a strategic approach and a sharp eye for what your audience is looking for and responding to.
Over the last year, we’ve used Pinterest to increase the traffic to our own sites, as well as the sites of some of our clients, and we’ve been amazed by how many new visitors it can bring in.
Here’s what we’ve learned about driving more traffic from Pinterest, so you can take advantage of this new content promotion channel yourself!
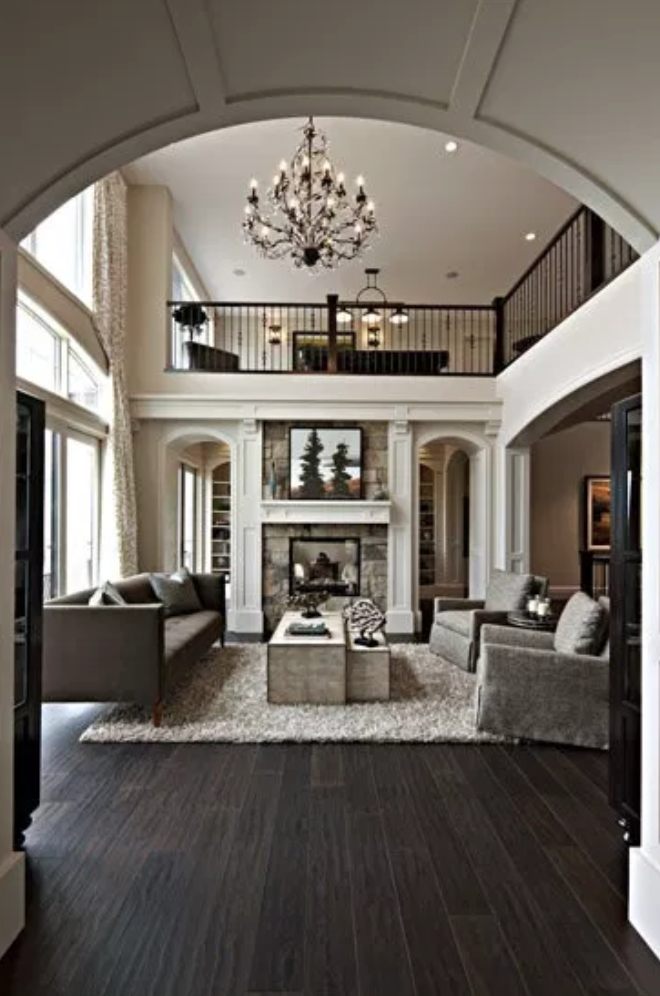
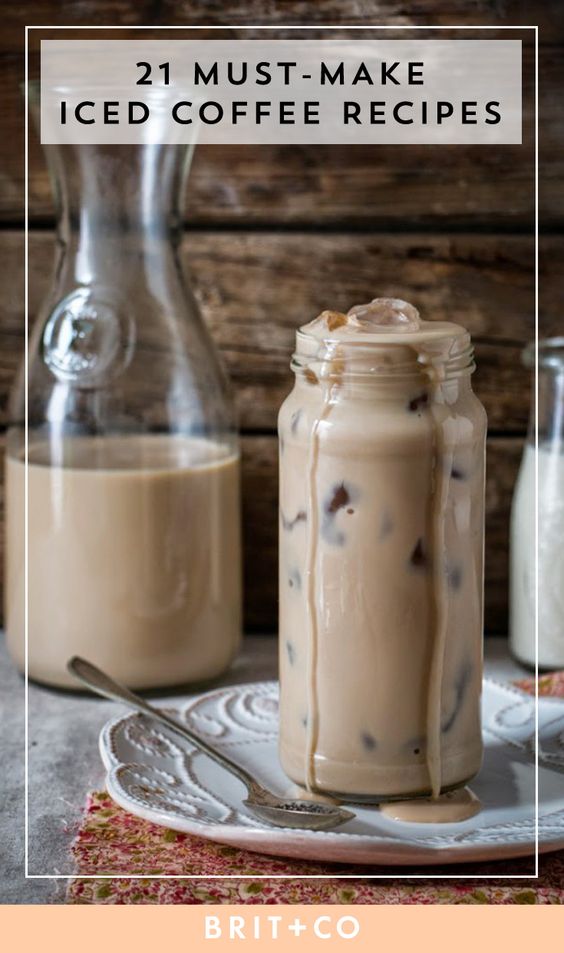
#1: Use clear, compelling, and aspirational photos
Pinterest users are more likely to click on a photo that represents what they want their life to be, not necessarily what it is.
To take advantage of that:
- Use professional photos of your products, instead of snapping a quick picture with your phone.
- Put some extra effort and budget into styling the contents of your photo. That might mean an interior decorator, or food, fashion, or prop stylist.
- Often, but not always, add a human element in the photo. For example, don’t just share a stock photo of a hat, but an impeccably dressed model sporting the same hat.
You get the gist. The truth is that real life photos don’t do as well on Pinterest as professionally styled photos.
Bonus tip
Once you’ve spent time producing and pinning enticing, aspirational photos, you need to make sure that they point interested Pinterest users directly to the place where they can get more information about what’s in the photo. That might be a product page, or your services page on your website.
You’re almost 100% guaranteed to lose a potential customer if they see something they like on Pinterest, click through the pin for more information, and find themselves on a homepage (or worse, a dead link!) with no idea how to navigate to the product they were interested in.
Remember to make it easy to find the content you’re promising by making sure that the pin links directly to the article that contains that image.
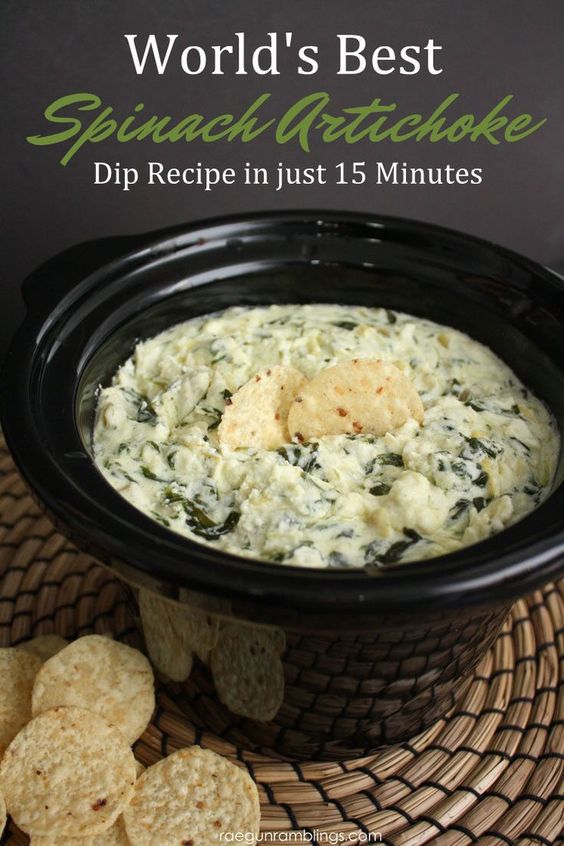
#2: Add text to your pins, when appropriate
Pinterest presents images in a “feed” format, as a collections of images that users scroll through.
Whether it is a home feed that a user sees when they first log in, or a big pool of search results, Pinterest never shows a user your image on its own. If someone is scrolling through their feed and scanning through the images, they’ll probably only see your image for a fraction of a second.
In that very short period of time, your image needs to catch their eye enough so they’ll stop scrolling and click through. Most images can’t do that on their own, at least not in a fraction of a second. That’s why, in most cases, it’s best to add some text to further entice the user to click through the pin to your website.
This is especially helpful with pins that represent processes, such as recipes, meal plans, and workouts.
Across Pinterest, you’ll see plenty of images (pins) with text, and plenty more without. It is not “wrong” to use a photo without text, nor are we going to tell you you’ll never have a successful pin or drive any substantial traffic from Pinterest to your website without writing on your pins.
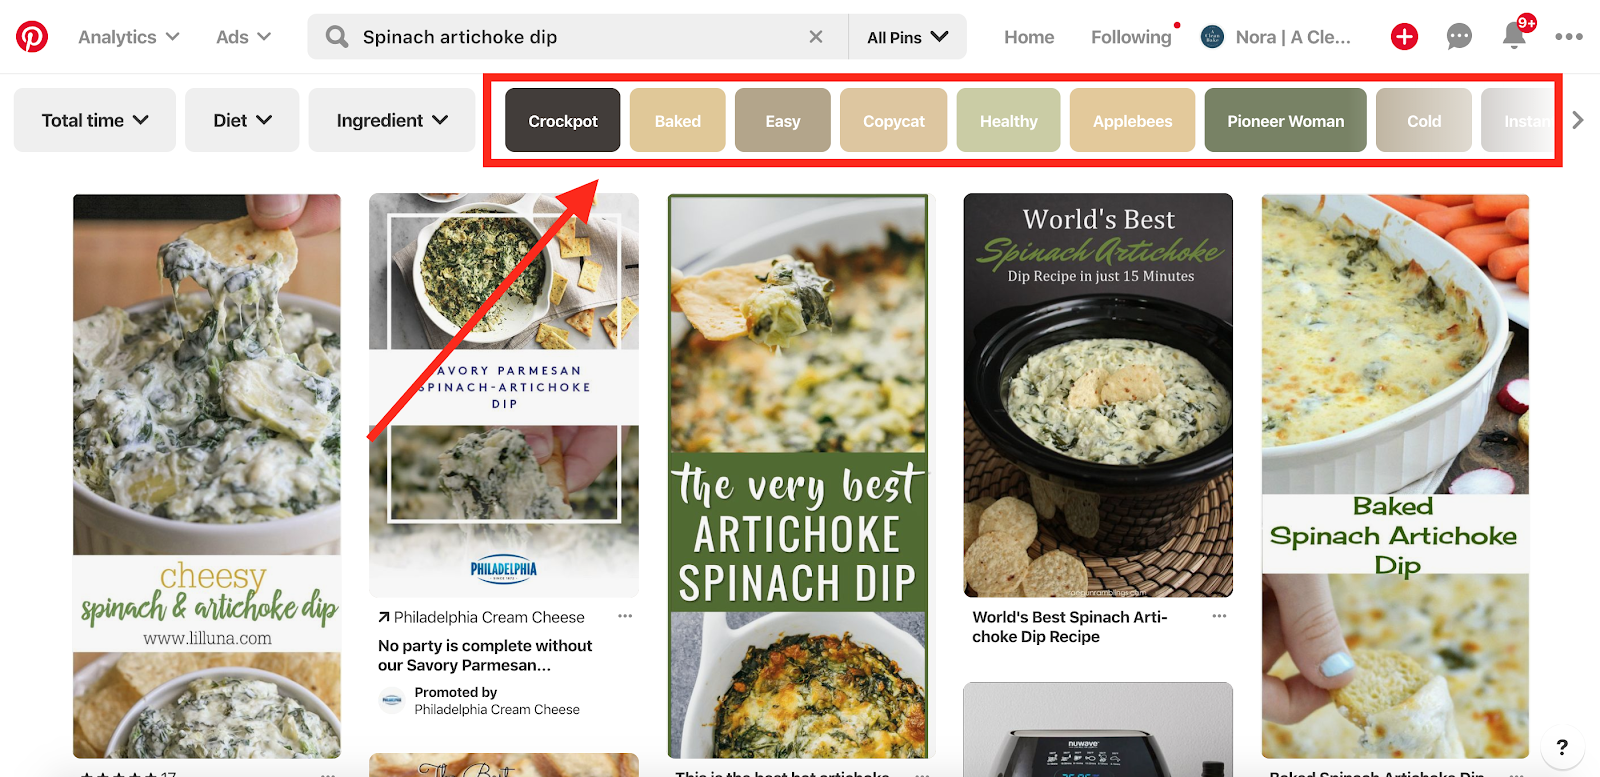
But here’s the thing: if you’re scrolling through a sea of images, and you see a photo of a bowl of white dip with some flecks of black and green in it, what will you think?
Is that dip? I’m having a party and could use some appetizers. But I hate artichokes. Is it artichoke dip? How do I make it? Is it from a mix? I don’t have time to make homemade. Do I? How long does it take to make? Do I have to serve it warm?….And so on.
On the other hand, if you see a photo of dip with the words “Dairy Free Homemade Spinach Artichoke Dip: Made in just 15 minutes!” you won’t waste time asking any of those questions. You’ll just click through the pin to the website where it originates.
So, although there are exceptions, MOST photos benefit from a little bit of text that will help Pinterest users understand what they’ll looking at in that fraction of a second, identify that it’s something that they’re interested, stop, and click through to your website.
Bonus tip
Also consider infographics, rather than photographic pins, when appropriate. This is especially helpful when you want to share a lot of information, such as a blog post about the health benefits of a certain supplement.
#3: Make Your Pins Visually Similar
Pinterest is a little like a form of packaging. If you’re a company that makes shoes, you wouldn’t want one style to be sold in a purple box and another to be sold in a green bag, right?
Of course not.
Because when someone buys the first pair and loves them, you want to be able to capitalize on the brand trust you’ve already cultivated to reduce the hurdles involved in getting them to buy the second pair.
Pinterest is a little like that. Making your pins look similar removes some of the selling your pins have to do to get brand fans to click on them.
But similar branding doesn’t mean every pin has to look exactly the same. It means your pins use the same font and similar styles and formatting, like a white border around the edges of the photo, so that fans can tell the pin is from you.
Let’s go back to the spinach dip example. Suppose someone found your spinach dip recipe pin on Pinterest, made it, and thought it was the best spinach dip recipe they’ve ever tried. Now they think of your brand as a very reliable source of delicious dip recipes.
Now, suppose they’re looking for an onion dip recipe on Pinterest. They search and find a lot of options – but suddenly, they see your style of pin. Chances are they’ll gravitate toward that pin right away, and try your onion dip before they click on any of the other pins.
Making your pins look similar increases brand recognition and encourages click-throughs from people who already like your brand.
Bonus tip
Whether or not to add your logo to the pin is optional. Some web-based businesses add their URL, but not their logo. Others use both.
Whatever you choose to do, be consistent.
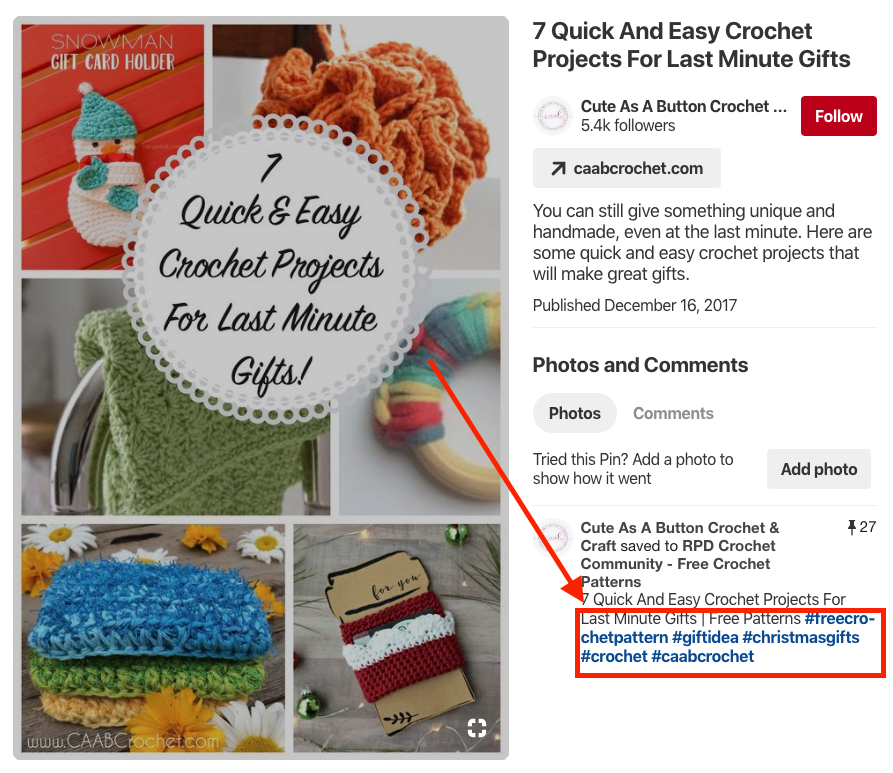
#4: Employ hashtags in your pin description
That’s right: hashtags aren’t just for Twitter anymore.
Facebook and Instagram hopped on board the hashtag trend, and Pinterest followed suit in mid 2017.
Although hashtags were met with mixed reviews by seasoned Pinterest users, they are actually a great asset, especially for new accounts.
Let’s back up and talk about how your pin, once added to your account, gets seen on Pinterest:
First, Pinterest will show it to some of your followers. Once you pin a new image, Pinterest may test drive its relevance and interest by showing it to a handful of your followers, or to people who search a keyword that appears in your pin description. Based on how much engagement (saves, called repins, and click-throughs to the original site) it receives, Pinterest will determine how valuable the pin is.
Second, Pinterest will show it to your followers’ followers. If your pin was interesting enough for your followers to repin it, Pinterest will then deposit that image in the feeds of your followers’ (who repinned it) followers. If they repin it, the process continues.
Third, your pin could go viral. That basically means that your pin keeps getting shown to, and repinned by, followers of followers of followers of…. Well, you get the idea. If you pin it and 5 people repin it, and then 5 of their followers repin it, and so on, soon your pin could be seen by thousands of people.
Your pin shows up in search results or category feeds to people who may or may not follow you. Pinterest will use engagement activity to determine how valuable a given pin is, and in turn, present it in relevant search results and category/browse collections closer to the top if it thinks it is a more relevant (i.e. more popular) pin.
What does this have to do with hashtags?
Clicking on a hashtag is a one-step search query. So, consider hashtags more keywords that, if searched, your pin could appear in results for. In other words, if you are a newer account that may not have a ton of followers or virality, using hashtags gives you more opportunity to be seen by non-followers searching for content that you produced.
Adding hashtags to your pin description increases the chances of your pin being found by users searching for ideas and solutions.
Bonus tip
Hashtags are currently severely underutilized, so they present a HUGE opportunity, especially for new pins and accounts that may not have a ton of organic visibility through pins and repins.
As of the end of 2018, Pinterest allows you to use up to 20 hashtags per pin. You certainly don’t have to use that many, but make sure you’re including hashtags for the most relevant keywords related to your pin.
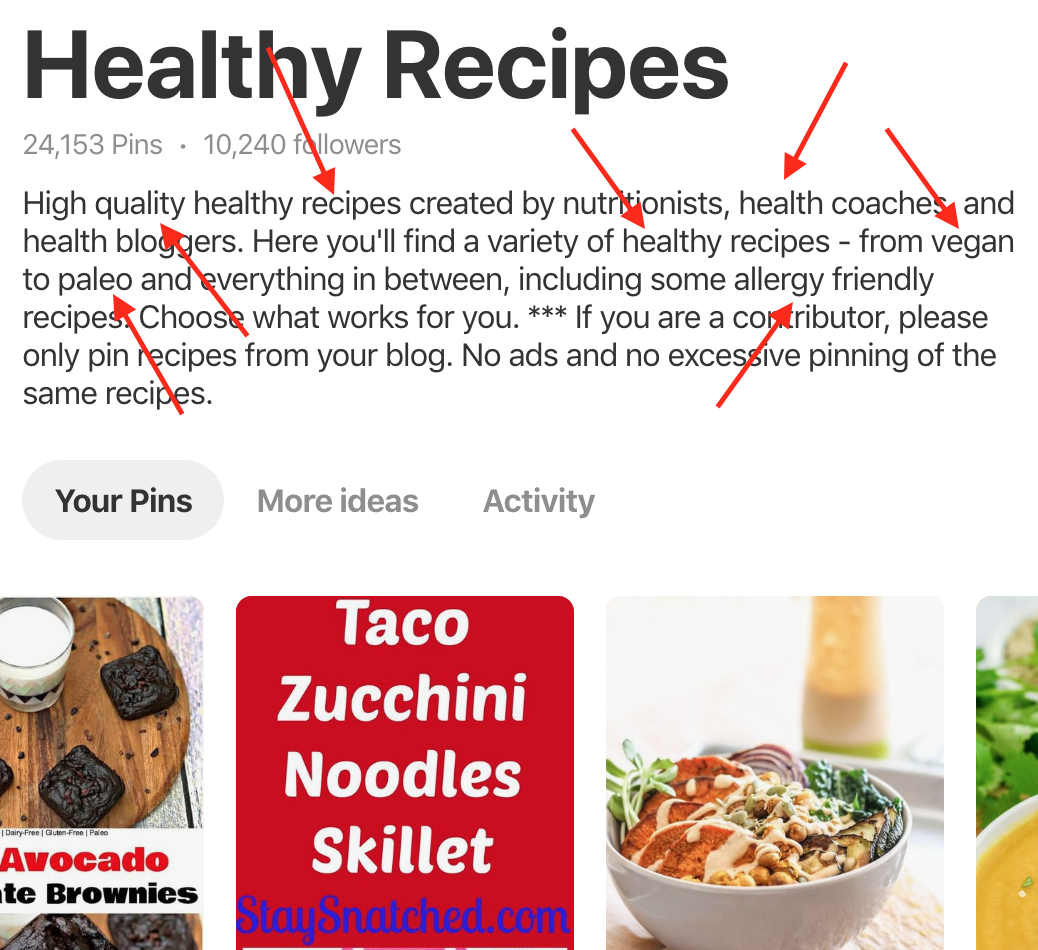
#5: Add detailed, keyword-rich descriptions on your pins and boards
Over the years since its inception, Pinterest has made hundreds of incremental changes to the way it serves up content to users, which have gradually transformed it from a simple social media platform (in which a user mostly sees the content shared by the people they follow, in chronological order), into a robust visual search engine.
Yes, I know I sound like a broken record at this point. But unlike Facebook or Twitter, your follower count doesn’t have as much of an impact on your content’s (potential) exposure. You know what does? Yep: keywords.
Just like you’d create a detailed meta description and keyword rich opening paragraphs for a post or page on your website, your pins and boards will be much more visible to users if they contain a detailed, keyword-rich description.
So, just like with Google SEO, you can increase your chances of your pins and your boards being found (see #4 for more) by working relevant keywords into pin descriptions and board descriptions. Don’t just add a sentence fragment, and for goodness sake, NEVER leave a pin description or board description field blank.
Taking a few extra seconds to write a thorough description for each pin and board on your account could mean the difference between your content languishing unseen in the black hole of Pinterest content, and it going viral.
Bonus tip
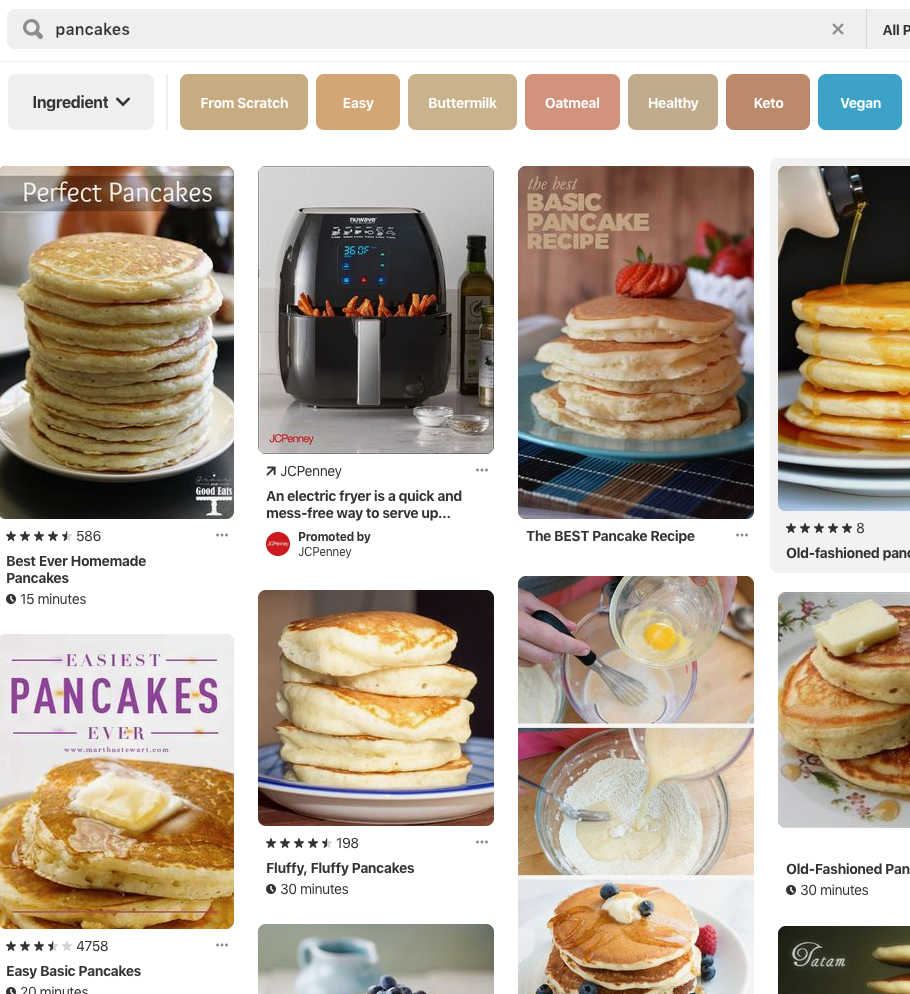
Having trouble figuring out which keywords to add your descriptions? Try this simple method for identifying related keywords on Pinterest: start by typing your main keyword into the search field at the top of your feed.
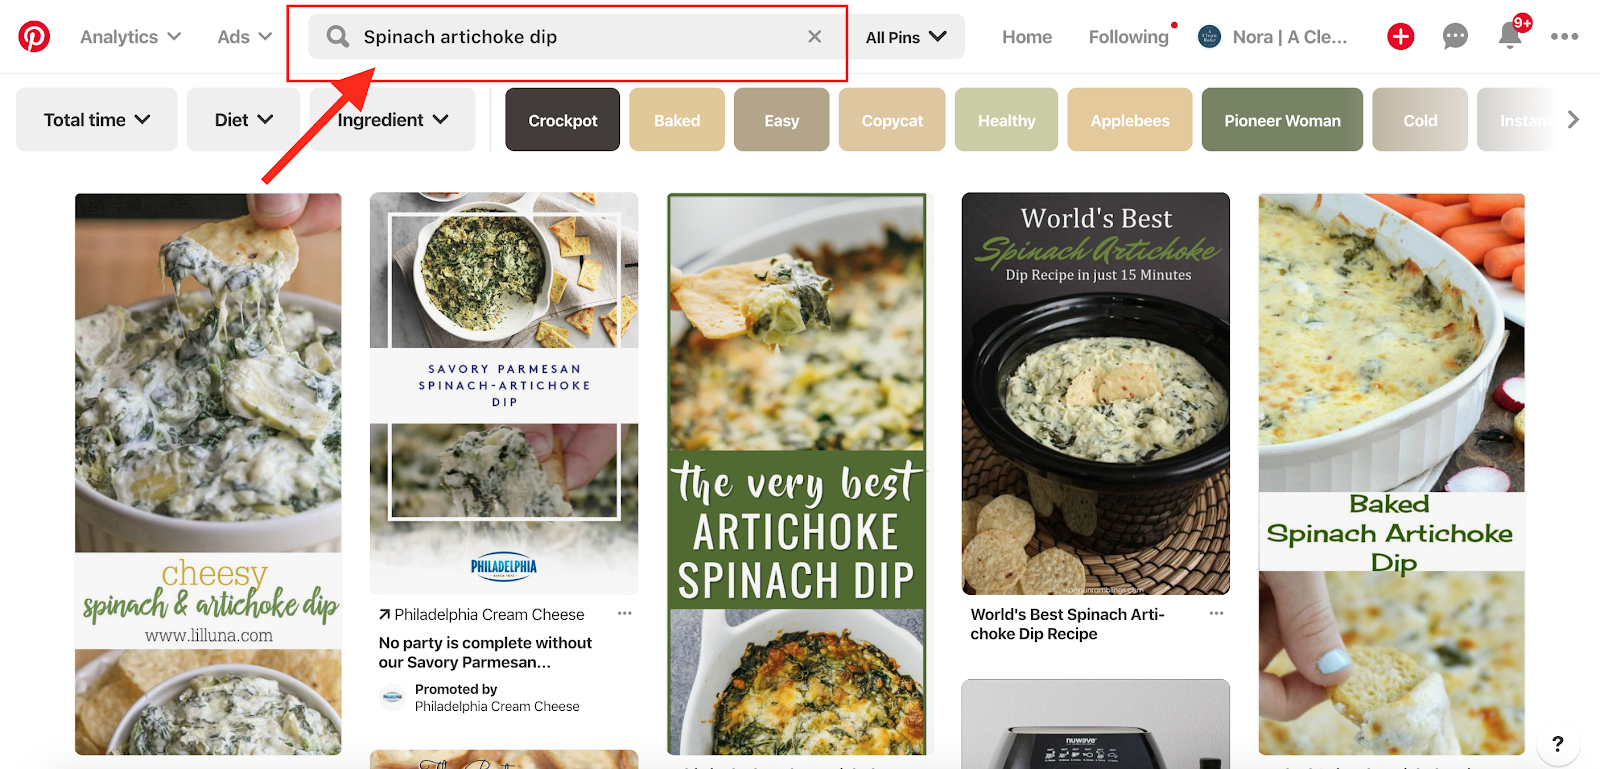
One the results appear, you’ll see a horizontal list of related keywords listed between the search box and the results:
Use the little arrow to the right of the related keywords to scroll and see the whole list. Chose 3-4 keywords (or more) to organically work into your description for the pin or the board, which will increase the chances that your content will be seen in search results.
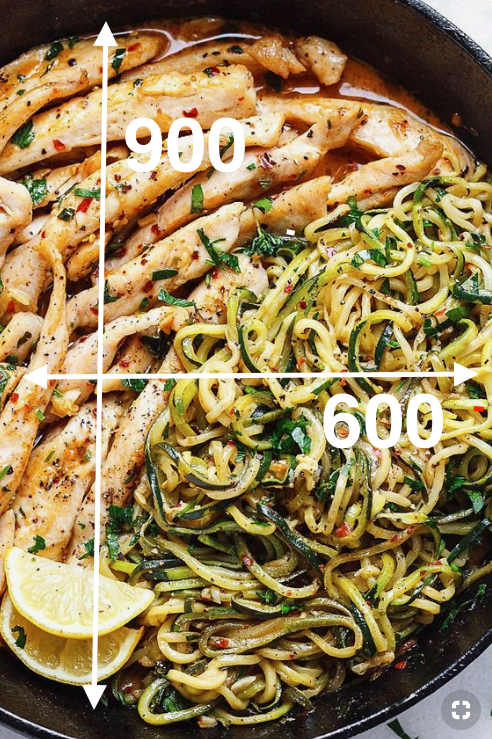
#6: Size your pins properly
This is a small detail that makes a big difference, especially if you’re growing your account from scratch.
Pinterest prefers vertical images with the dimensions 600 pixels wide x 900 pixels tall. That’s the dimensions that they have decided will be visible in people’s feeds.
So, if you create smaller or horizontal pins, you’re forfeiting valuable visual real estate in your followers’ feeds, making it just a little harder to stand out among the thousands of other images they’re looking at.
But if your pins are larger, the image will be less likely be seen and may be cut off in users’ feeds (especially on mobile; up to 80% of Pinterest users are on mobile).
So, for the best chances that your pins will be fully viewable, stick to vertical 600x900px images!
Bonus tip
If all the photos you have are horizontal (landscape) oriented, use a photo editing program like Photoshop, PicMonkey, or Canva to stitch them together vertically, to form – you guessed it – a vertical pin.
#7: Curate Your Profile
This is somewhat controversial advice. Some Pinterest experts will tell you that it doesn’t matter what your profile looks like because Pinterest users rarely see it – they only see your pins in their feed.
We disagree.
Creating a visually appealing – that is, organized, well labeled, and easy to navigate – Pinterest profile doesn’t take much time and effort, particularly if you are starting from scratch, or nearly so, and can establish the organization as part of your Pinterest SOPs from the start.
Yes, it is true that many more users will see and interact with your individual pins in their feed, or even one of your boards on its own, but may never lay eyes on your entire profile page (that is, the page that shows up when you go to www.pinterest.com/yourusername).
But, if you’re building engagement from scratch, every viewer counts. A well-organized, clearly-labeled, and visually-appealing board layout allow visitors to quickly identify what kind of content you share – and browse, repin, and follow more of your content if they like what they see!
Bonus tip
Pinterest boards are displayed on your profile in a format that allows one image on the board to be displayed prominently as the “cover” image.
Pinterest will randomly select a cover image for each board if you let it, but you can (and should!) manually select the cover image that best illustrates the content of the board, and leaves a viewer wanting to see – and pin – more.
To designate a cover image, first confirm that the image you want has been added to the designated board. Then open the board (www.pinterest.com/yourusername/your-board-name) and click the edit icon, which looks like a pencil, just above the board title.
When the edit pane opens, look for the option called Cover, click the “change” button, and use the right-facing arrow to scroll until you select the image you want to be your cover.
Finally, adjust the framing of the image until it looks the way you want it to display, click save changes, and then click save on the edit pane.
Now, if you go back and view your profile, the new cover image should display for that board.
#8: Create more than one pin per page, when it makes sense
When you’re just starting out, you may not have a lot of content to share.
That’s ok; doing more with less is the name of the game when it comes to getting your Pinterest account off of the ground.
It doesn’t mean scrambling to produce an onslaught of Pinterest-friendly content before you launch, though. It means strategically maximizing the Pinterest potential of what you have right now.
No one says that you have to stop at just one pin for a given page on your site. If you have a complex article that offers lots of different information and answers multiple user questions, create a pin to showcase each answer or type of information.
For example: We write a lot of articles for our Cup & Leaf blog that are geared toward sharing a holistic view of a particular type of tea. The article might contain a history of the tea’s use, how the tea is cultivated and dried for drinking, and a recipe to make the tea properly.
That translates into the potential for three different pins:
- “The complete history of green tea”
- “Everything you need to know about growing green tea (and how to identify the best)”
- “How to make the perfect cup of green tea”
Three times the number of pins for a post means three times the potential visibility, repins, and traffic to your site!
Bonus tip
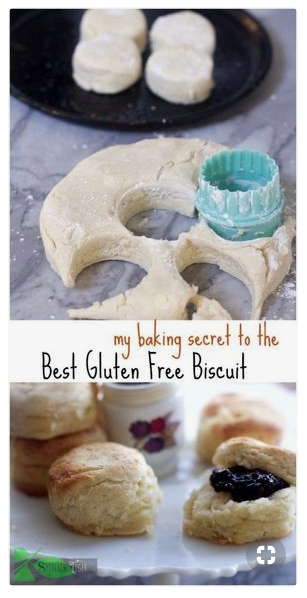
Consider creating both a photo pin and a graphic or infographic pin for the same page.
This is especially helpful when your content doesn’t necessarily have distinct sections that lend themselves to multiple pins for the same page. Instead, think about how to you present the same information differently, such as a photo and an illustration or infographic.
#9: Avoid overtly self-promotional pinning
Pinterest is about engagement and sharing; it is not a venue for you to dump a bunch of your content once every week or so, never to be seen or heard from until the next content dump.
You’ll grow a more authentic Pinterest account if you engage with others by pinning and repinning content that is not your own in an organic way.
Just remember: Pinterest wants (and therefore likely algorithmically rewards) users who engage with other users and with the platform.
What that means in practical terms:
- Pin others’ pins as much as, or more than, your own. Many Pinterest experts recommend that you should be pinning up to 80% others’ content, and only 20% your own. Yes, this means less potential traffic and visibility in the short run, but it means a more authentic and successful account in the long run!
- Pin throughout the day (almost) every day, rather than dump a bunch of pins once a day or once a week.
- Live pin – aka manually pin – in addition to, or instead of, using a scheduler like Tailwind.
Bonus tip
This is not to say that you should NOT be using a scheduling app in addition to live pinning, in order to ensure that your content is getting pinned at strategic times and intervals throughout the day.
However, do some research before you choose a tool. Pinterest verifies certain apps as partners, and those apps that aren’t verified tend to be at a major disadvantage. Choosing a non-certified third party tool means you run the risk of your content that is shared by that tool being suppressed, and your reach being drastically affected as a result.
#10: Verify your site and create a business account
Pinterest offers two kinds of accounts: a personal account, which is the default option, and a business account, which offers bonus features like analytics and the opportunity to run ads to promote your brand on Pinterest.
If you don’t already have a Pinterest account, make sure you create it at pinterest.com/business/create. Fill out the information about your business (name, website, industry), and click Create.
If you already have an account, you can convert it to a business account (free of charge). Make sure you are logged in to your account, then visit pinterest.com/business/convert/. Fill out the information about your business (name, website, industry), and click Create.
In both cases – creating or converting – you will also need to add a line of code to your website to verify that you are who you say you are.
Once you’re signed up and verified as a business account, you’ll have access to bonus features and valuable analytics, which allow you to create and share more effective and engaging pins.
Happy Pinning!
PS: Don’t forget to follow us at pinterest.com/cupandleaf!
Updated January 2019.
All images in this post are from Pinterest.com.